Audio Description
This guide covers the full Audio Description (AD) workflow in Dubformer Studio: creating the project, reviewing the automatically generated script, selecting narration voices, and refining text and performance before delivery.
Part 1: Create an Audio Description project
1. Select the project type
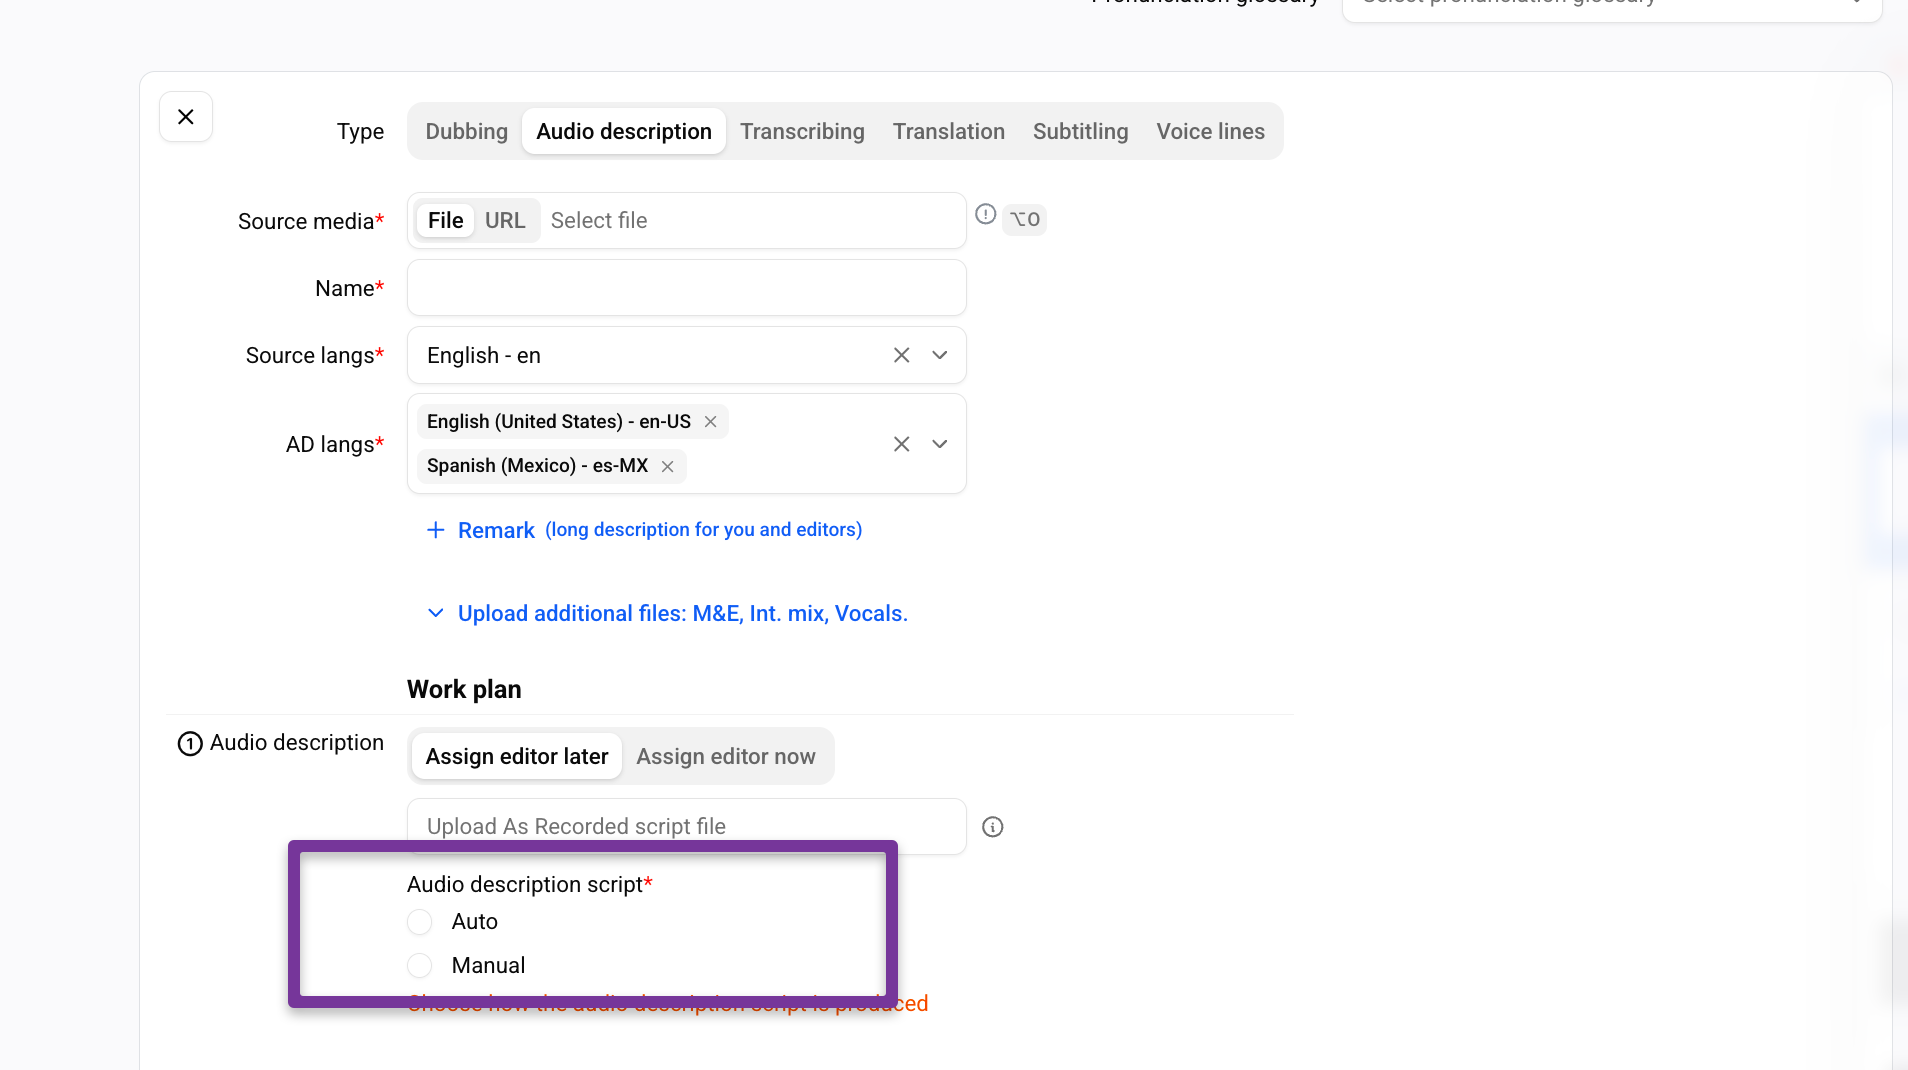
When creating a new project, select Audio Description as the project type.
2. Upload the source video
Upload the source video and give the file a clear, recognizable name.
Supported formats: mp3, mov. Maximum file size/duration: 5 GB.
3. Set the source language
Select the language spoken in the source video.
Dubformer analyzes the original dialogue to identify where speech occurs and capture its timing. These timings define the available spaces where AD narration can be placed without overlapping the original dialogue.
If you have the as recorded script, it could be uploaded as well.
4. Select the AD languages
Choose the languages for the AD narration.
5. Upload supporting materials (optional)
Add any supporting files that may be useful during AD production:
M&E (Music & Effects) — improves mix quality of the final AD track
Vocals audio — improves dialogue gap detection accuracy
As recorded (original) script — if an existing script should be used instead of ASR. Accepted formats: xlsx, csv, .srt with timecodes.
6. Choose how to create audio description:
Select Auto to have Dubformer generate an AD script automatically.
The AD engine analyzes source dialogue timings and generates description that fits within the available spaces between spoken lines, following standard AD writing conventions (objective, present-tense description; no interpretation of intent or emotion unless visually evident).
Select Manual if you would like to upload scripts or create AD from the scratch.
7. Create the project
When all settings are ready, click Create project.
Part 2: Working inside the Audio Description task
Once the project is created, open the task to review, refine, and finalize the AD script and narration.
1. Open the task or assign an editor
Open the task yourself, or assign it to an editor.
If you selected auto-generation, opening the task will display the automatically generated description text, aligned to the identified gaps in dialogue.

2. Select narration voices
Go to the Speakers tab to choose voices for AD narration. Three options are available:
Library voices — pre-built voices available in Dubformer.
Cloned voices — create a voice clone from an audio sample.
Voice design — generate a voice from a text prompt.
3. Edit text and performance
Refine the script and narration using two tabs:
Script editor — click a chunk to edit its text. [See: Task editor: tools and controls]
Visual editor
Control pronunciation and delivery using performance prompts and other options.
4. Preview narration
Play back the generated narration against the video to confirm timing, pacing, and mix balance before finalizing.
5. Finalize
Save your progress and Process the changes to generate the final result.
Part 3: Deliverables
On completion, export results.